Creating Photoshop Brushes Tutorial
Compatibility:
Photoshop 7 to current version
Photoshop Elements 2 to current version

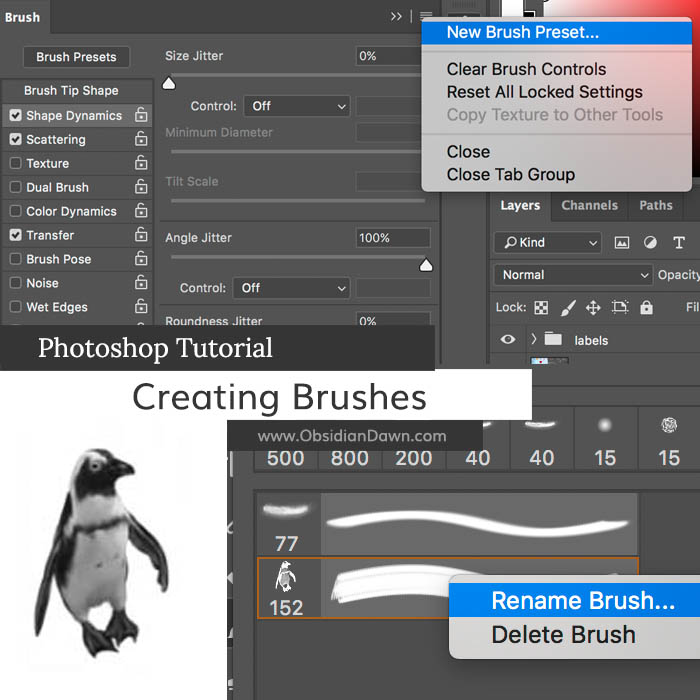
This tutorial will walk you through creating Photoshop brushes. It details how to create the brushes themselves and save them into a set.
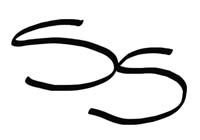
1. Creating your own custom Photoshop brushes is easier than you might think. First, let’s create a simple signature brush. Open a new file within Photoshop (File > New..), and make it approx 500 X 500 pixels. The resolution doesn’t matter. Make it 72 pixels/inch, or whatever it starts on. Make sure that the mode is RGB. For “Background Contents,” choose white.
When you’re making a signature brush, make sure you make it large enough to accommodate your needs. A lot of us are working on pretty large scales, now-a-days, and you want it large enough to be able to work on anything. 2500X2500 pixels is the largest brush that you can possibly make. So make it that large if you’d like. Remember, you can always scale the size of the brush DOWN much better than you can scale it UP.
When you make a brush, ALWAYS make sure it has a white background. Everything that is white will remain an “empty” area when it comes to the brush – a gap or a hole, if you will. You’ll see what I mean as we go along. Now, using black or a dark color, make your signature.
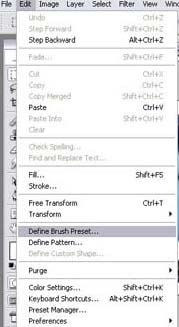
2. Mine is fairly sloppy and simple, but you get the idea. You can make it as ornate as you wish. In fact, that’s one of the wonderful things about using a signature brush – you don’t have to reproduce it each time! Now, under the top menu, under “Edit” click on “Define Brush Preset.”
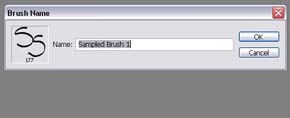
3. Photoshop will show you a preview of how your brush will look, as well as give you an opportunity to name it. Name it “signature brush” or whatever you like. Notice also that the size of the brush (in pixels) is listed below the preview. That will be the default size that this particular brush opens to. Remember, you can change it to whatever size you like later – up to 2000 pixels. The larger it is here, the less fuzzy it will be at those large sizes.
4.That’s it! Really! Open a new file and play around with your new brush. It will be listed in with all the others that you had currently active. Be careful, however, as it is not yet saved as a part of a brush file. So, if you go load a different set of brushes, it will be lost. We’ll show you how to save it in just a moment. Let’s make a second, more complex brush, first – then we can save them as a brush set!

5. Open a picture of whatever it is you want to make a brush out of. I’ve chosen to use one of my speedpaintings, a penguin. Crop the piece around the part of it that you would like to make into a brush file. You don’t want any extra room on the edges that you need to worry about.
I generally do this in one of two ways. I make a white layer beneath the photo layer, then just use the lasso tool or eraser to “erase” around it. OR, if it’s more intricate… I make a NEW layer on top of the photo layer. I then paint white around the area that I want to make a brush out of. By doing it this second way, if you make a mistake, you can fix it much more easily! (Multiple layers are fine when it comes to making brushes – it will act as though it was all one flat image when it creates it.)

6. You’re going to want to have all white surrounding that penguin so that when you make the brush, it doesn’t end up with the background being a part of it, too. This is the most time consuming part of the brush process, especially if you’re making intricate brushes!

7. Again, go in to Edit>Define Brush Preset and create your brush. See how all those blues are created to grayscale? All brushes are created that way – Photoshop will do it for you. That is so that when you choose a brush to paint with, you can use whatever color you want! Name your brush and click “OK”. Again, feel free to play around with it in a new file. This is what my new brush looks like:
8. What good is all of that if you can’t save them, though, right? So, here’s the last part of the tutorial. Saving your new brushes as a set.
This next step is assuming that you have not made any of your own brushes before now (if you did, then they were added onto the end of whatever brush set(s) you have open, and when you do this step, you will lose them unless you save them first.) If you’ve not ever made your own brushes before, (which this tutorial assumes, since you’re following it) then you’re fine.
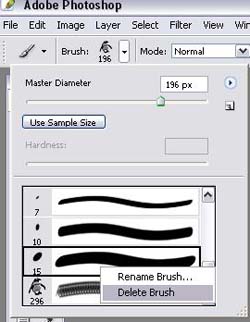
Go back into your brushes and delete any of the ones that had been previously in there – ones that you do NOT want as a part of your new set. Don’t worry, this doesn’t delete them as a file, it just removes them from your list of “active” brushes. (This is assuming, of course, that you haven’t made any other brushes on your own and not saved them!) To do that, right click on the brush you want to delete, and click on “delete” – as simple as that!
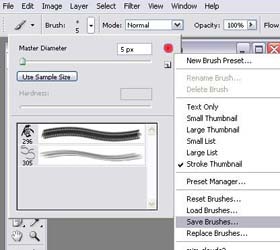
9.When you are left with ONLY the brushes that you want as a part of this new set, click on the same arrow that you would click on to load up new brushes (highlighted in red on the picture to the right), then choose “Save as..”. Now, you’re going to want to put this in the right directory, so that it will automatically load up in your list of brushes whenever you start Photoshop. Within your Photoshop directory, place it in the Presets>Brushes folder. For example, if you installed Photoshop CS onto your C drive in the path that the installation program defaults to, you would find this folder in: C:\Program Files\Adobe\Photoshop CS\Presets\Brushes\. Choose an appropriate name for it, and you’re done!
Note: You will have to close and re-open Photoshop before that brushes set will be visible among those that you can choose from the menu on the right. Alternatively, you can choose “Replace Brushes..” and load them that way.
10. Congratulations! You just made your first brush set!