Removing Transparency with Brushes Photoshop Tutorial
Compatibility:
Photoshop 7 to current version

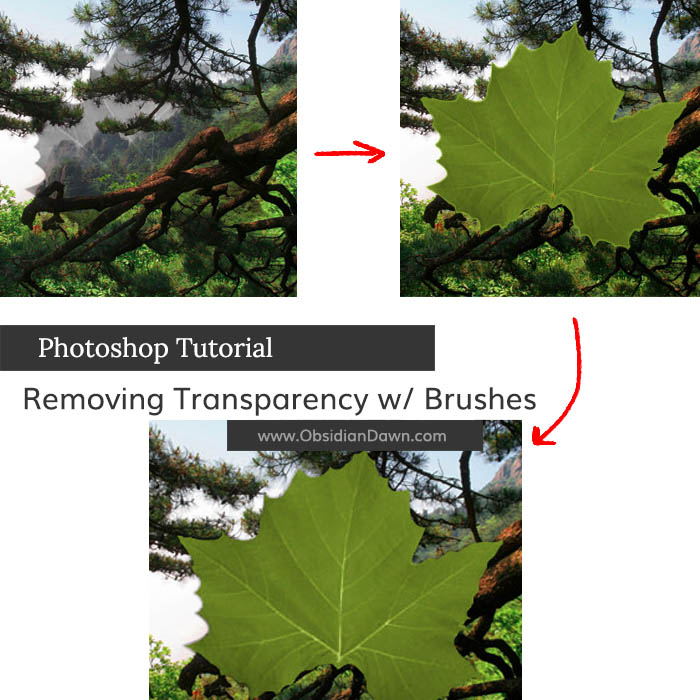
This tutorial will walk you through removing transparency with brushes. Some of ObsidianDawn.com’s older brushes are “image based.” Sometimes you may want to use a brush, but you don’t want the transparency that is inherent to Photoshop (and GIMP, etc.) brushes. This tutorial will explain how to remove that transparency.
The tutorial has been made with Photoshop in mind, but these principles are all very basic. If you understand how to use layers in PSP (Paint Shop Pro) or GIMP, you should be able to follow along with this tutorial.
1. Open an image. Any image will do, as long as it is made up of varying colors. We’re just going to use it as a backdrop for your brush, to show when the brush is no longer transparent (when the background doesn’t show through anymore).

Once you have it open, make a new layer on top of that background layer. Click on the “Create a new Layer” button on your layers palette (to be sure your layers palette is showing, click “Window” on the main menu and make sure there’s a check mark next to it). I’ve highlighted it in pink here.
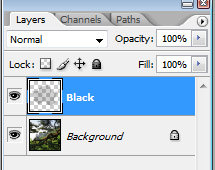
2. Rename that layer to “Black” by right clicking on it in the layers palette and choosing “Layer Properties.” Type “Black” in and hit “Ok.”
Load the brush set of your choice. I’m going to be using one of my own brushes, from my “Leaves” set. This one is the “Sycamore1” brush, if you want to follow along. Choose black as your foreground color. Then, making sure that the “Black” layer is active/selected (if you’re not sure, just click on it to select it), click in the middle of the canvas with your leaf brush. Make sure that it doesn’t overlap the edges of the canvas! If you need to, resize the brush first so that it fits.
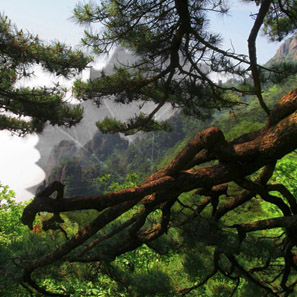
3. Notice how you can barely see my leaf brush? And what you can see is extremely transparent. But it’s there. Now, to get rid of that transparency.
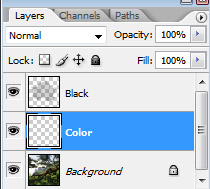
4. Time to make a new layer again. Click on the Background layer to make sure it’s selected, and then click on the “Create a New Layer” button on the layers palette again. It should create a layer between the Background and the Black layers. Rename it the same way we did before (right click on the layer and choose “Layer Properties”), and name it something like “Color.”
This is the layer that we’ll be adding color to.

5. Holding down CTRL (CMD for Mac), left click on the “Black” layer within the thumbnail window (I’ve highlighted it here in pink). Make sure that you click within that thumbnail! Older versions of Photoshop let you click anywhere on that layer, but CS2+ makes you click on the thumbnail. ALL versions will work if you click on the thumbnail, which is why I say to do that. :) When you do, you should notice that there is now a selection on the canvas.
What you’ve done here is selected the leaf brush’s shape. CTRL (CMD) + click loads the layer’s content as a selection. You’ll see what I mean on the next step.

6. Select the color that you want your leaf to be as your foreground color. I’m using green (imagine that, eh?).
Now choose the paint bucket tool. Make sure that your “Colors” layer is still selected and then click somewhere on the canvas within the leaf. It will fill in the leaf selection area with green. If you only do this once, it will still be somewhat transparent. If you want to remove all transparency, click several times, until you can’t see through it anymore.
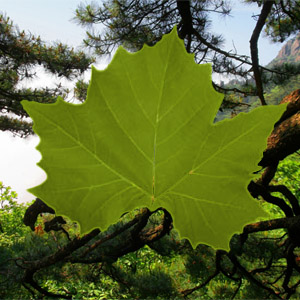
7.Select > Deselect to deselect (or CTRL-D on PC, CMD-D on Mac). Here’s what my leaf looks like now. Notice the little bit of extra green around the edges? That happened as we used the paint bucket tool over and over again. But we don’t want it there, it doesn’t look right.
So, choose the magic wand tool and click anywhere outside the leaf area on the “Colors” layer. That selects the portion of the canvas outside the leaf. Now, Select > Modify > Expand and choose 1 or 2 pixels. I used 2. Hit DELETE, then CTRL-D (CMD-D on Mac) to deselect your selection and get a look at what you’ve done.

8.Much better, right? Looking a bit more like a leaf now.
But, notice those see-through areas at the base of the leaf, where the leaf’s “vein” is? You can see a bit of the tree through it.
That’s because of how Photoshop brushes work. Remember that they are made using black/gray on a white background. Wherever that white background is, the Photoshop brush is completely transparent. So, anywhere that there was white on an image, there will be holes when you make it into a brush.
Knowing this, all that you have to do now is go back and fill in those holes with white or a color very close to it.
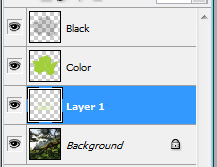
9.To do so, let’s make a new layer beneath those the Color layer.
Choose white or a very light green as your foreground color, then go in and “paint” the white into the transparent areas. You don’t need to be precise, because your leaf isn’t transparent anymore! The white will only show through where you have those “holes.”
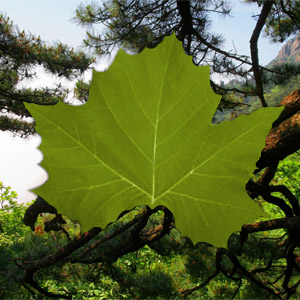
10.This is what mine looks like now. It looks a good deal like a maple leaf! No fake-looking transparency. You can use this technique with just about any brush there is.
If you’re good with your mouse, you can paint in colors on that “Colors” layer instead of using your paint brush tool. Doing it this way, you can add multiple colors to your image, and much more intricate details. But as you can see, this technique works just fine the way that I’ve explained it here, and anybody can do it!
You can also go through and add a gradient, pattern, etc. to your “Colors” layer, if you so choose. Maybe the leaf didn’t have enough texture for you this way and you wanted to add your own. That’s how you’d do it – by choosing “Layer Styles” on the layers palette and selecting “Pattern Overlay.”
Hope that you’ve enjoyed this tutorial, and that it’s as helpful a technique for you as it has been for me!